1. Activate Xendit as payment gateway
-
Once you have activated Xendit plugin, you need to validate the licence in HBook > Licence.

-
Set Xendit as active payment gateways in HBook > Payment > Active payment gateways
2. In Xendit, generate a secret key and create the webhook
Please note that the API Secret Key and the Webhook Verification token are different for Sandbox and Live environment.
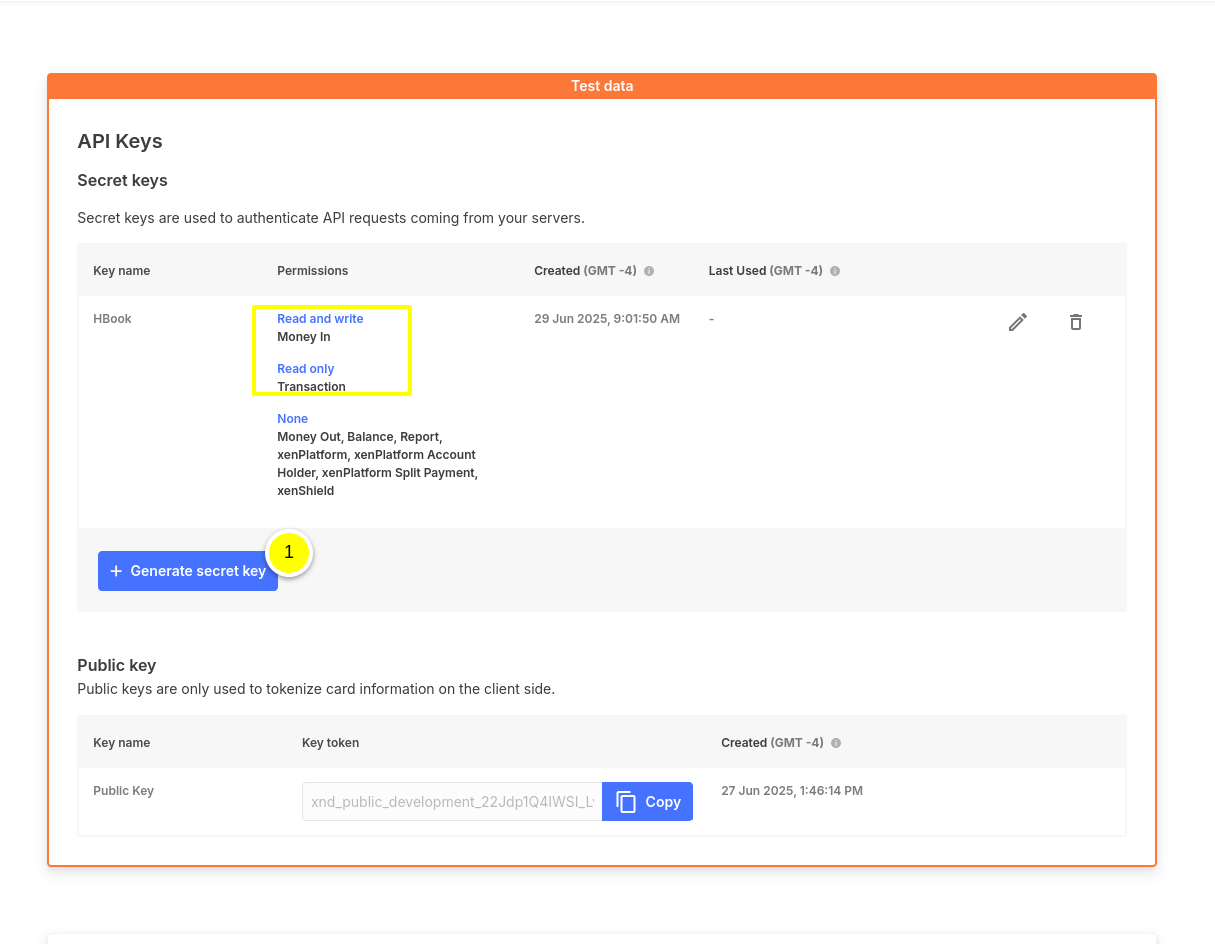
You will generate a API Secret Key, retrieve the Webhook verification token and create the Webhook in the same menu of your Xendit dashboard : Configuration > Settings > Developers > API Keys.
Secret Key
-
You will generate a “Secret API Key”. Please review in the screenshot the “Permissions” you should set for this API Key.
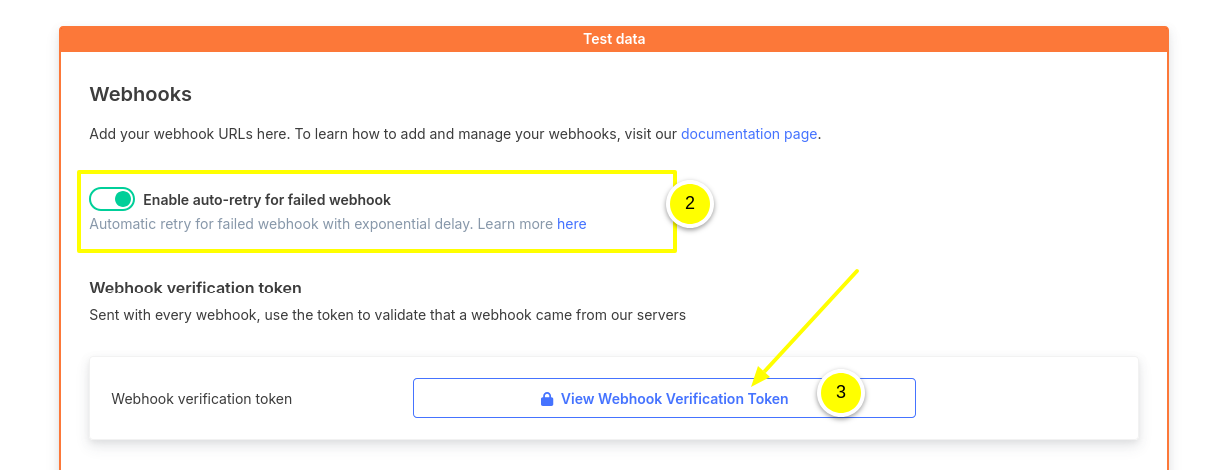
Webhook Verification Token
-
Enable the auto-retry for failed Webhook calls.
-
Retrieve your Webhook verification token
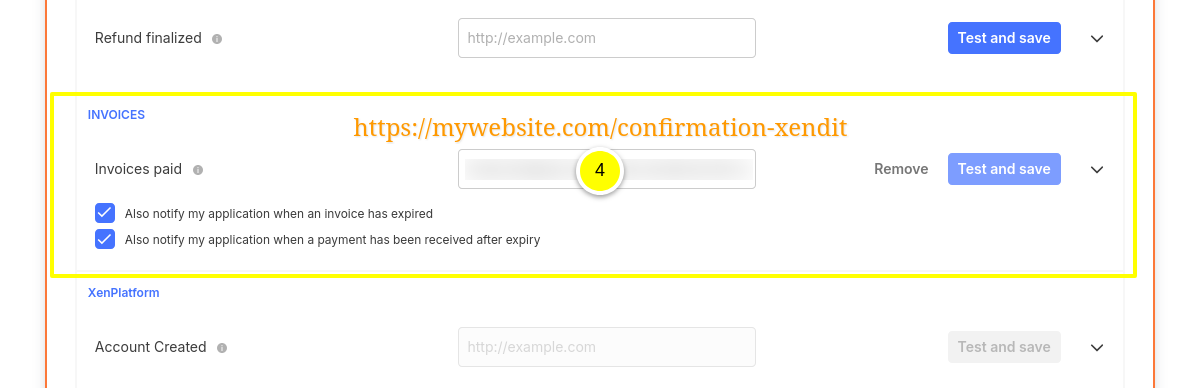
Add the Webhook URL
-
Indicate the Webhook URL for the server-server callback once the payment is finalized on Xendit. Please check the screenshot below to understand how to set up this Webhook. It has to be created for the “Invoice” API, for “Invoices paid” event. The URL structure is important : you append “/confirmation-xendit” to your WordPress site URL.
You will indicate it as “www.domain.com/confirmation-xendit”, changing “www.domain.com” to your actual WordPress site URL.
If you have Test and Live sites, please make sure you enter each time the correct webhook for the correct environment.
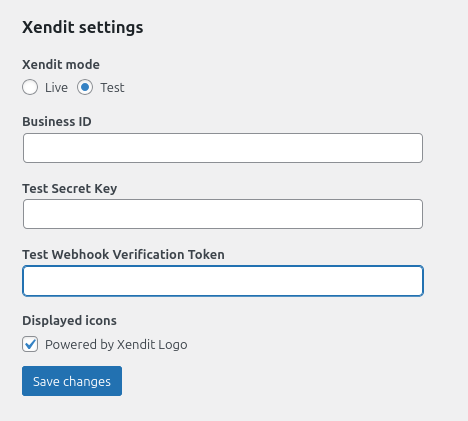
3. In HBook, add Xendit credentials
Enter your Xendit information for “Sandbox” or “Live” environment in HBook > Payment > Xendit settings. These settings are different in Sandbox and Live environment.
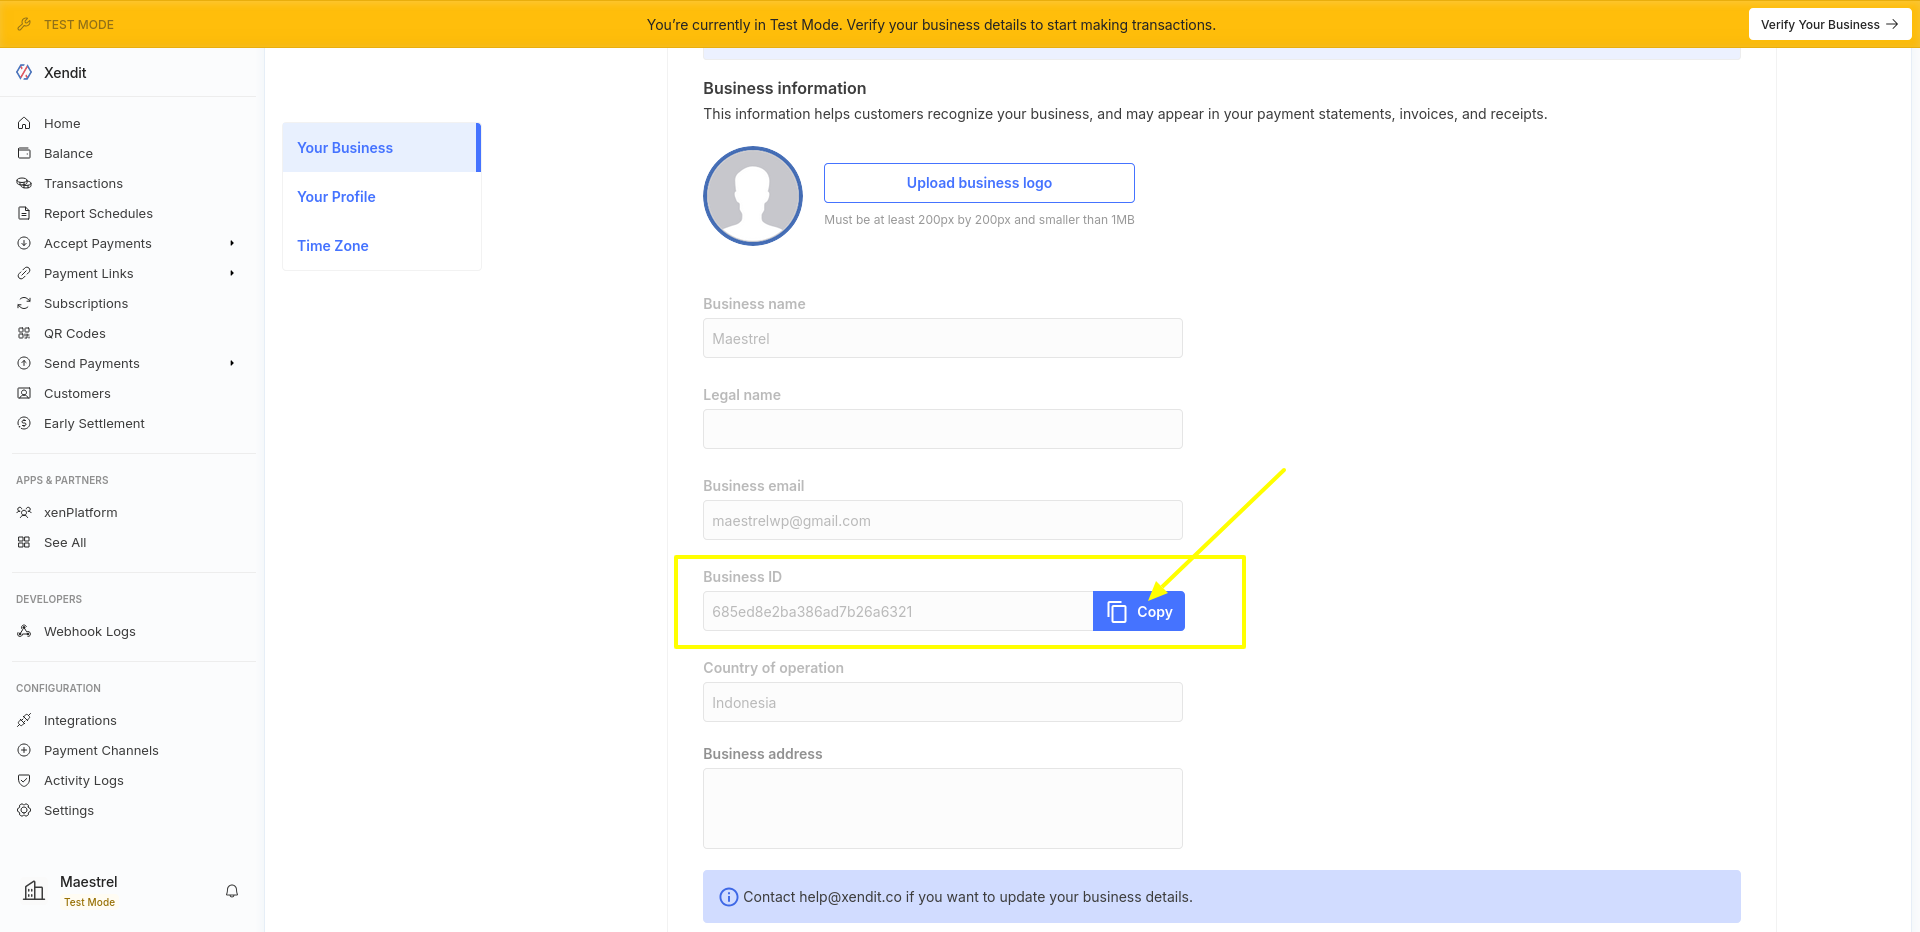
Where can I find the Business ID?
This is your “Account ID”, provided by Xendit. You can find it as well in Profile > Your Business.
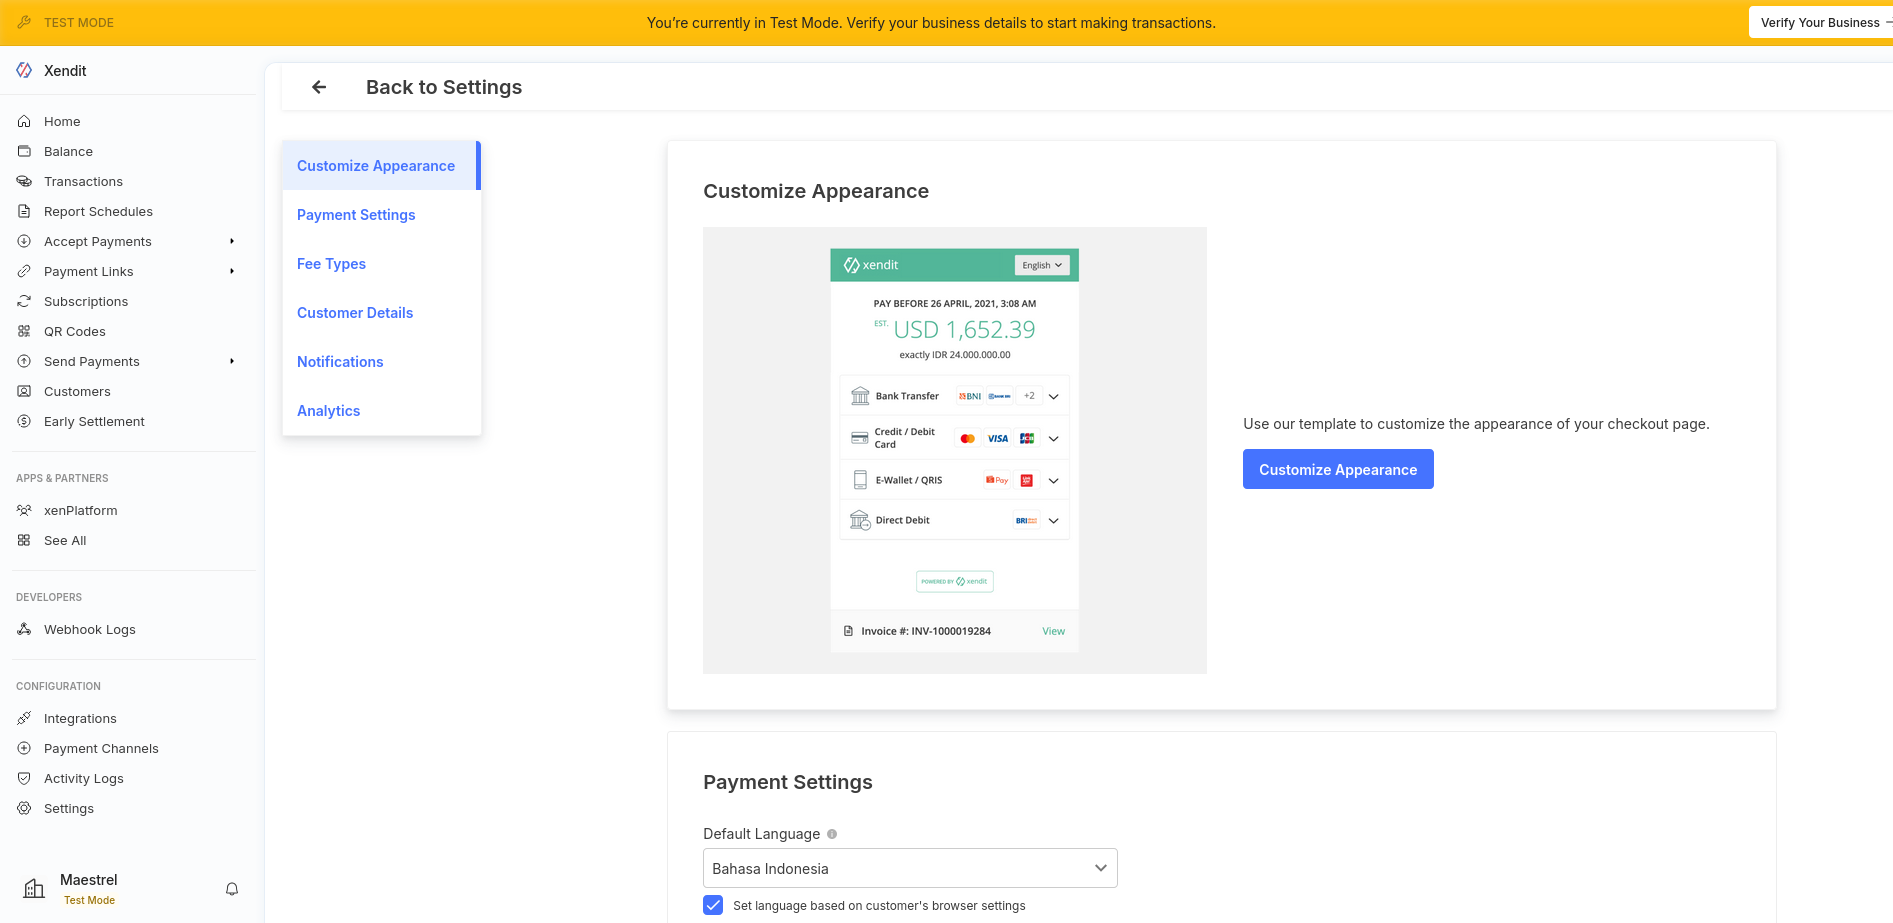
How can I customize the Xendit Payment page?
You will find customization options directly in Xendit dashboard, in Settings > Accepting Money > Checkout. Here you can modify the appearance, enable the payment methods you wish to enable, customer information you wish to collect, etc.