1. Activate Nexi XPay as payment gateway
-
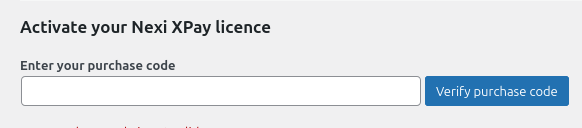
Once you have activated Nexi XPay for HBook plugin, you need to validate the licence in HBook > Licence.
-
Set Nexi XPay as active payment gateways in HBook > Payment > Active payment gateways
2. In HBook, add Nexi XPay credentials
Enter your Nexi XPay information in HBook > Payment > Nexi XPay settings.
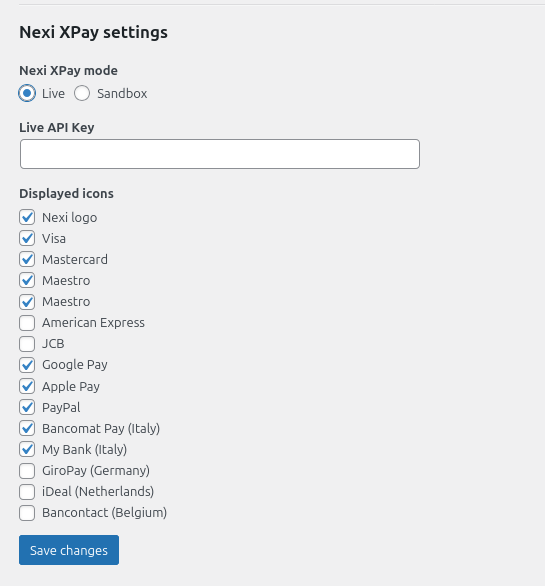
Where can I find the API key for the Live environment?
For the Test environment, the Nexi XPay test account is used by default. You do not need to specify any API Key.
For the Live environement, this key is generated in XPay back office.
To generate the new credentials for the production environment, follow these steps:
-
Sign in to the XPay Web Back Office.
-
In the Admin section, click on API Key.
-
Click on Add new API Key.
-
Once the terminal has been selected, click on Add to generate the production API Key.
Nexi XPay payment methods
You will enable the payment methods you wish to allow directly in Nexi XPay dashboard. Some payment methods are only available for specific countries. List of Nexi XPay Payment methods.
Where can I find test cards?
You can find information on payment tests in the Nexi XPay documentation: Test environment
It is not possible to run tests in local environment. Even “Test” environment for Nexi Xpay for HBook has to be done on an online pre-production site. This is due to Nexi requirements for parameters that can’t be with a local URL.
How do I customize Nexi XPay payment page?
From the Back Office portal, you can customize the checkout page by inserting the logo of your store.
IP to whitelist to receive the webhook notifications
Nexi XPay send a notification that is used by HBook to retrieve the status of the payment. You may need to check with your hosting to allow the following domains and IPs.
Domain:
IP Addresses:
-
185.198.117.13
-
185.198.117.14
-
185.198.118.13
-
185.198.118.14