PayZen add-on includes translation files for French language. If your website/user is in French, you will see the admin and the front-end already translated to French.
1. Activate PayZen for HBook as payment gateway
Once you have activated PayZen for HBook plugin, you need to validate the licence in HBook > Licence.

-
Set PayZen as active payment gateways in HBook > Payment > Active payment gateways.
2. In HBook, add PayZen credentials
-
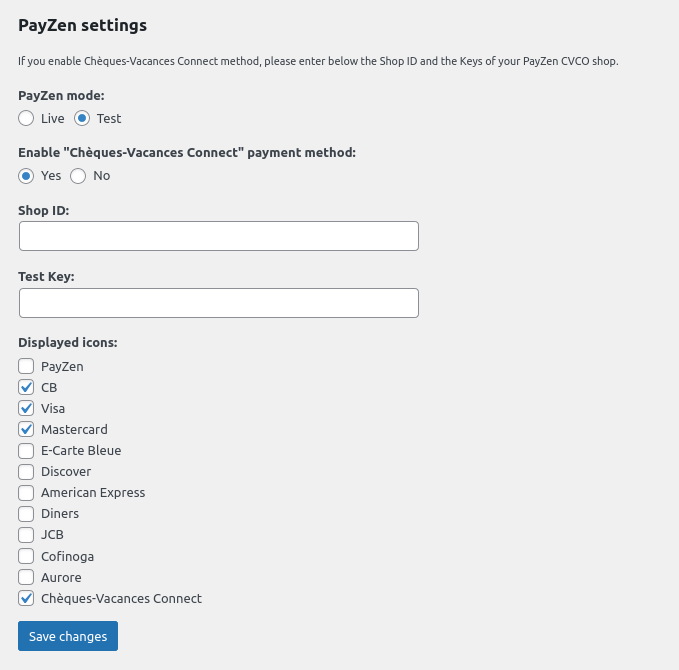
You will need to add the following information, in HBook > Payment > PayZen settings.
-
You will find the Shop ID and Keys in Paramétrage > Boutiques > Clés. If you wish to enable “Cheques-Vacances Connect” payment method on HBook, make sure that you are providing the “Shop ID” and “Key” of your CVCO account on PayZen Back Office.
3. Configure the Notification URL
Add the Notification URL
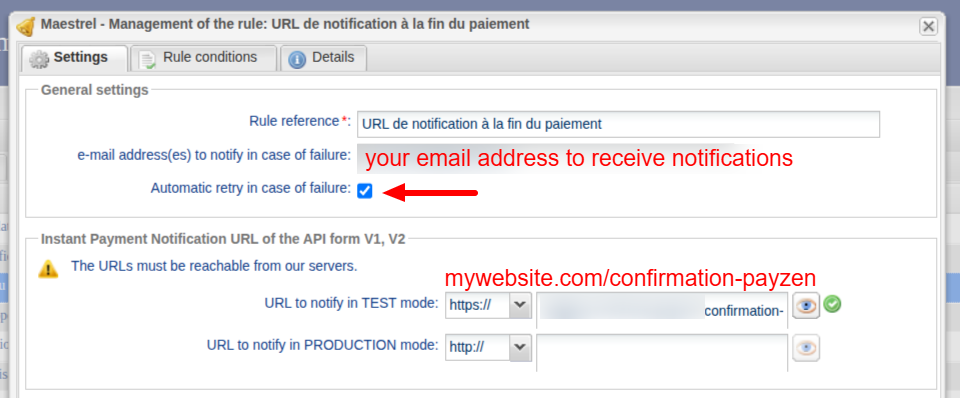
In PayZen Back Office, go to Settings > Notification rules. Then, you will click on “URL de notification à la fin du paiement”, which will open the notification settings.
-
Add your email to receive an email in case of a failure of the call to your notification URL
-
Tick the box “Automatic retry in case of failure”
-
You will add your Notification URL in the section “Instant Payment Notification URL of the API form V1, V2”. Please check the screenshot below to understand how to add your URL. The URL structure is important: you append “/confirmation-payzen” to your WordPress site URL.
Leave empty the Return URL
In Settings > Shop, you should leave empty the fields for the “Return URL” as this is transmitted automatically to PayZen.

WordPress permalinks settings
In Settings > Permalinks, the permalinks structure should be set to “Post name” (%post_name) so that HBook can catch this call.