1. Activate Authorize.net as payment gateway
-
Once you have activated Authorize.net plugin, you need to validate the licence in HBook > Licence.

-
Set Authorize.net as active payment gateways in HBook > Payment > Active payment gateways
2. In HBook, add Authorize.net credentials
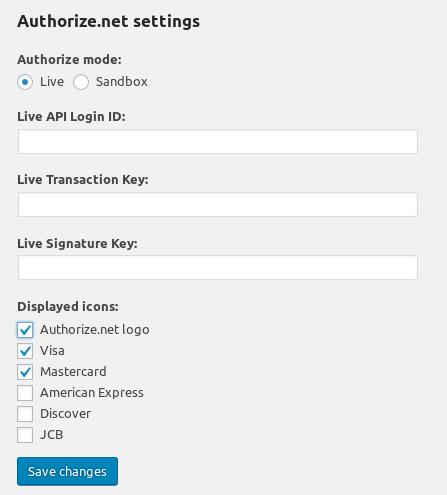
Enter your Authorize.net information for “Sandbox” or “Live” environment in HBook > Payment > Authorize.net settings. These settings are different in Sandbox and Live environment.
Where can I find the Authorize.net credentials?
You will find the API information in your Authorize.net dashboard : Account > Security Settings > API Credentials & Keys. You will need the “API Login ID” and the “Transaction Key”. You will as well need to generate a “Signature Key”.
Please note that the credentials are different for Sandbox and Live environment.
3. In Authorize.net, create the webhook
In your Authorize.net dashboard, you will need to create a Webhook in Account > Business settings > Webhooks. Please check the screenshot below to understand how to set up the Webhook. The “name” does not really matter, but the URL structure is important : you append “/confirmation-authorize” to your WordPress site URL.
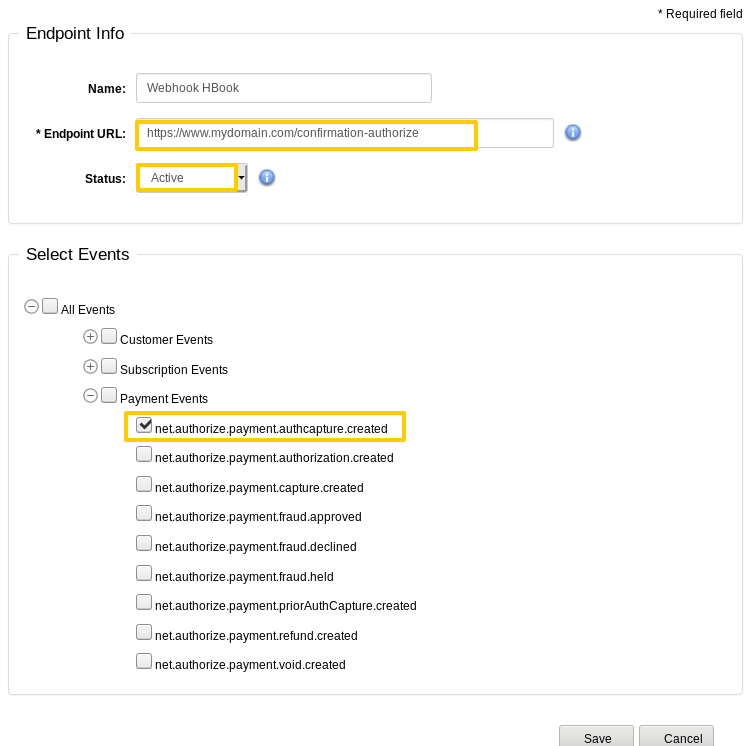
You will indicate it as “www.domain.com/confirmation-authorize”, changing “www.domain.com” to your actual WordPress site URL.
If you have pre-production and production sites, please make sure you enter each time the correct webhook. In Sandbox Authorize.net dashboard, you enter the pre-production webhook URL. In Live Authorize.net dashboard, you enter the production webhook URL.
Whitelisting Authorize.net IPs
To make sure the webhook call is correctly received, we recommend whitelisting the IPs from Authorize.net. You can see the list of IP in this help article from Authorize.net. You should whitelist the “Webhooks” IPs. Please contact your host provider if you are unsure about how to do this.
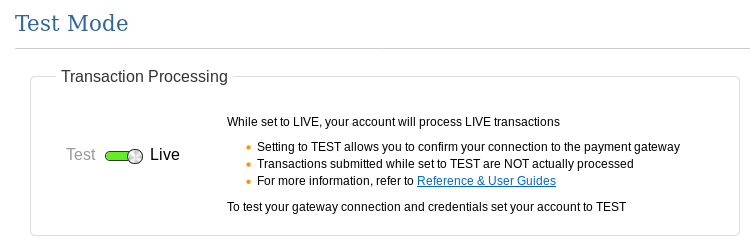
4. Additional setting for Sandbox environment
Make sure that you are in “Live” mode in Account > Security settings > Test mode. This needs to be always in “Live” even when on Sandbox environment ; else the webhooks are not called. No real transactions will take place when using Authorize.net Sandbox account, even when set to “Live” in Test mode settings.
Test and Live environments
How to create a Sandbox Authorize.net and a Live Authorize.net account?
-
You can create a Sandbox Account from here. The login URL is: https://sandbox.authorize.net/
-
You can sign up for an Authorize.net account from here. The login URL is : https://account.authorize.net/
Authorize.net test cards
You can check the list of test cards here.
What steps to move from Sandbox to Live transactions for Authorize.net?
-
Enter the Live Authorize.net “API Login ID”, “Transaction Key” and create a “Signature Key”
-
Add the production webhook url in your Authorize.net dashboard
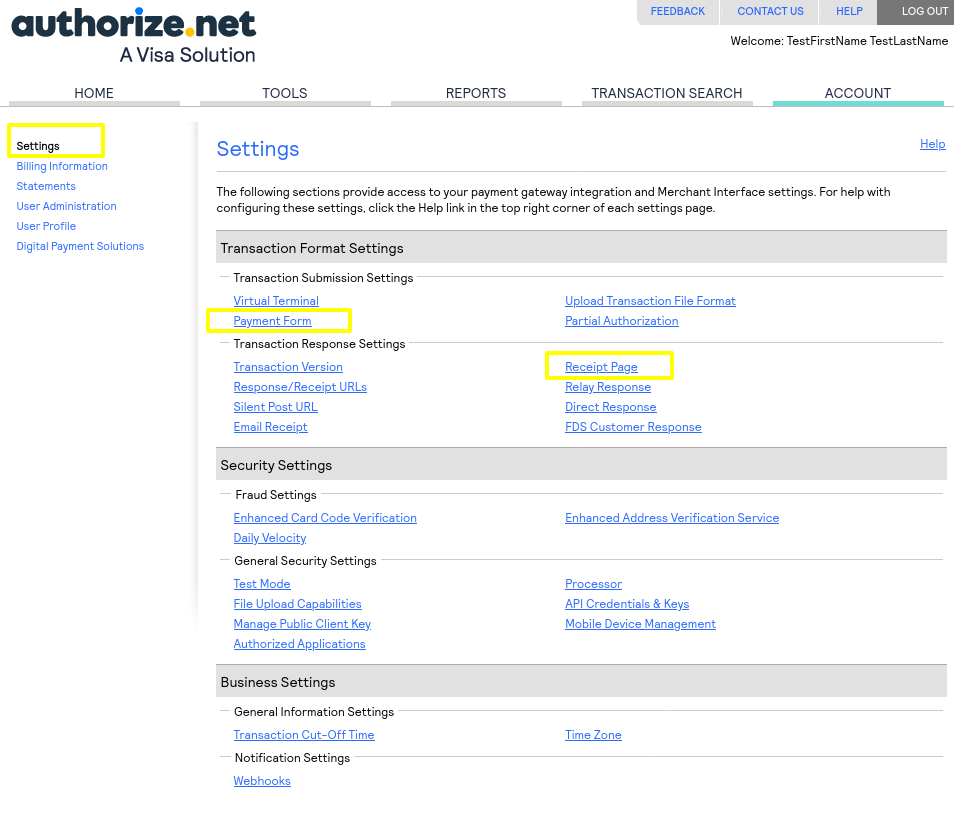
How can I customize the Authorize.net Payment page and Receipt page?
You will find customization options directly in Authorize.net dashboard, in Settings > Transaction format settings. You can modify the color, font, etc. to make it match your branding.