1. Activate Viva Wallet as payment gateway
Once you have activated Viva Wallet plugin, you need to validate the licence in HBook > Licence.

-
Set Viva Wallet as active payment gateways in HBook > Payment > Active payment gateways.
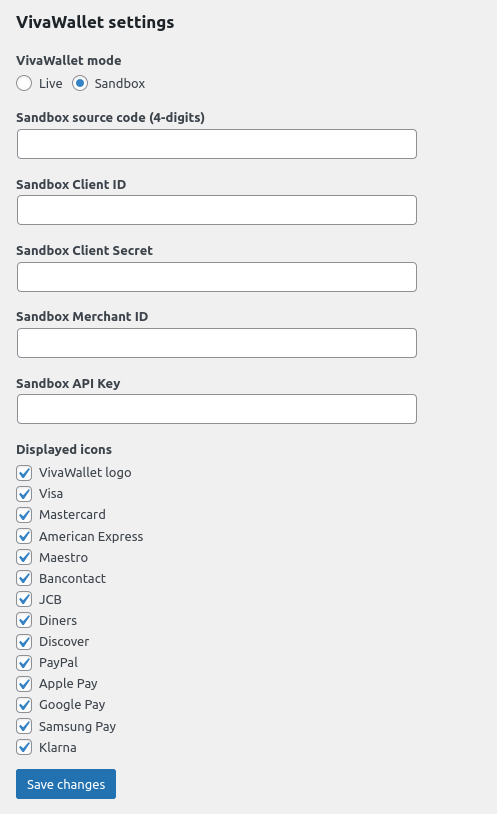
2. In HBook, add Viva Wallet credentials
-
You will need to add the following information, in HBook > Payment > Viva Wallet settings.
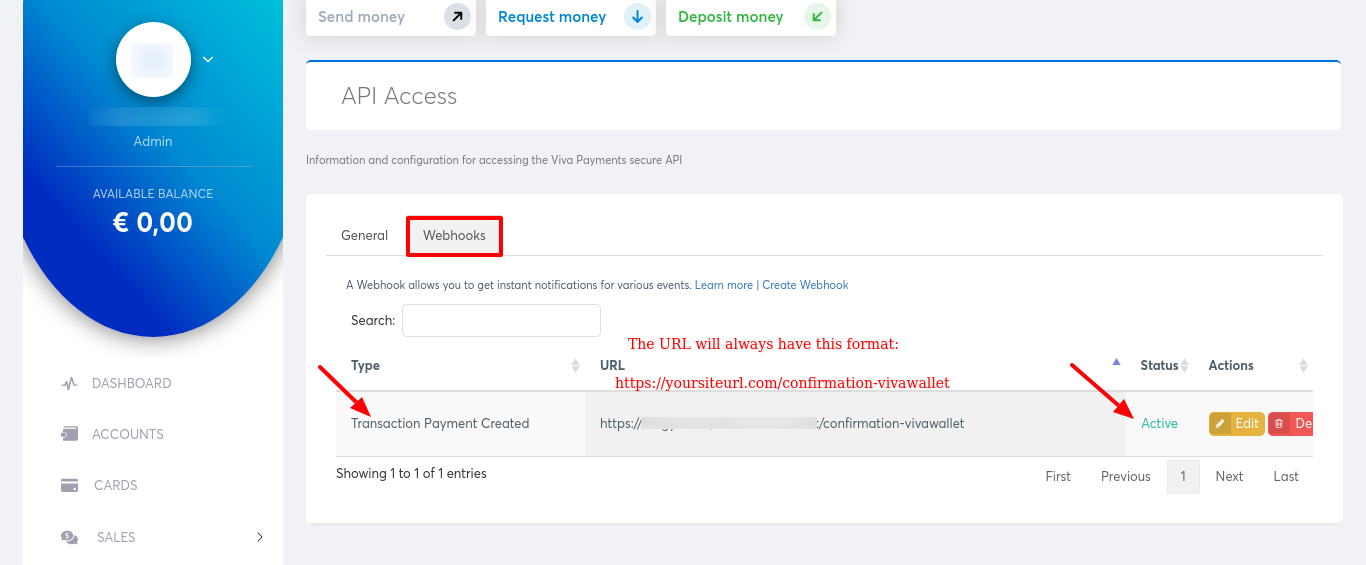
3. In Viva Wallet dashboard, create a webhook
In Viva Wallet dashboard, you will need to create a webhook. Navigate to Settings > API Access and go to the tab Webhooks. You will need to indicate :
-
the URL of the webhook. You will indicate it as “www.domain.com/confirmation-vivawallet”, changing “www.domain.com” to your actual WordPress site url.
-
set it as “Active”
-
select the event type “Transaction Payment Created”
Do I need to whitelist Viva Wallet IPs? Where can I get information ?
If you have troubles to verify your Webhook url, you should whitelist Viva Wallet IPs to make sure you receive the webhook call. You can find the list of Viva Wallet IPs here.
How to create a Sandbox Viva Wallet account ?
You can create a Sandbox Account from here.
How to create a Live Viva Wallet account ?
You can create your Live Account from here.
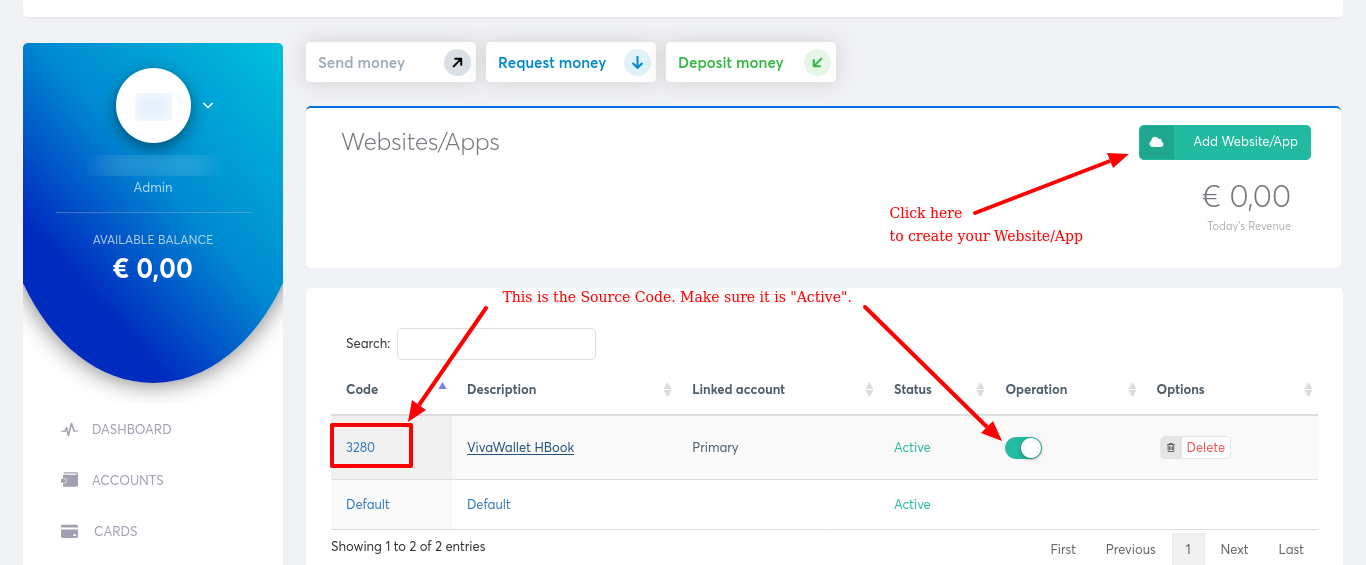
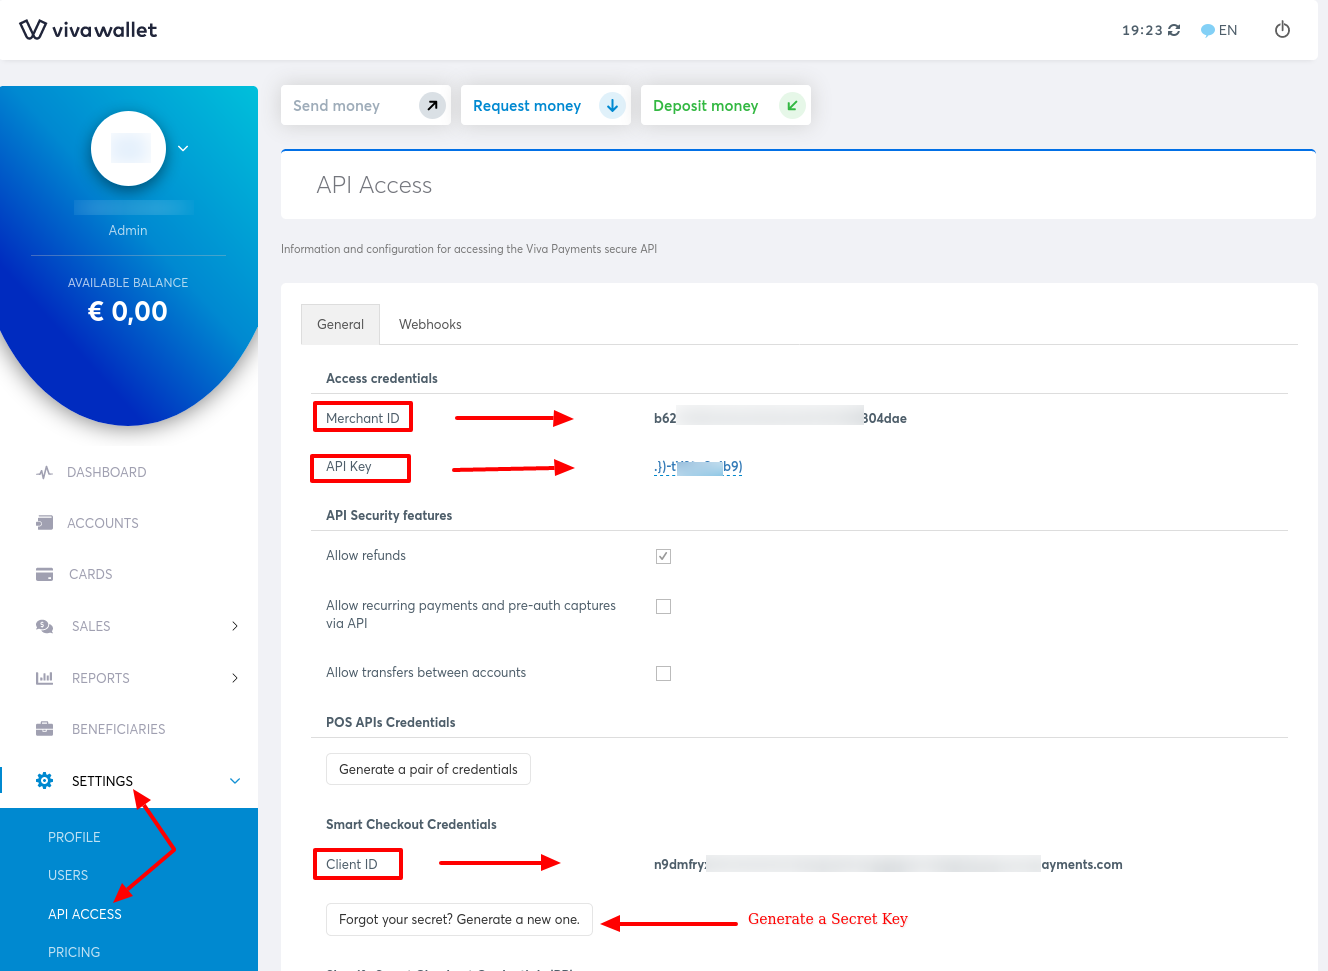
Where to find the Source Code, Merchant ID, API Key, Client ID and Client Secret ?
-
Source Code: You will need to create a website/app in Viva Wallet dashboard. Navigate to Sales > Online Payments > Websites/Apps. Click on “New app/website” and check below for the settings. You can name it for example “Viva Wallet HBook”.
-
When you create or edit a website/app, you will see the following settings. Please make sure that you enter the “Success URL” and “Failure URL” as described.

-
Merchant ID, API Key, Client ID and Client Secret : Navigate to Settings > API Access.
Which cards to use to test Sandbox environment?
You can find the test card details here.